To create an email message:
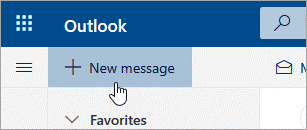
- At the top of the page, select New message.
- On the To line, enter the name or email address of the person who will receive the message.
**Note: When composing a new email and clicking the To or Cc buttons, to select names, simply start typing on the To or Cc line, and your related contacts will be shown. - On the Add a subject line, enter a brief description of what your message is about.
Below is an example of how the message composition window will appear: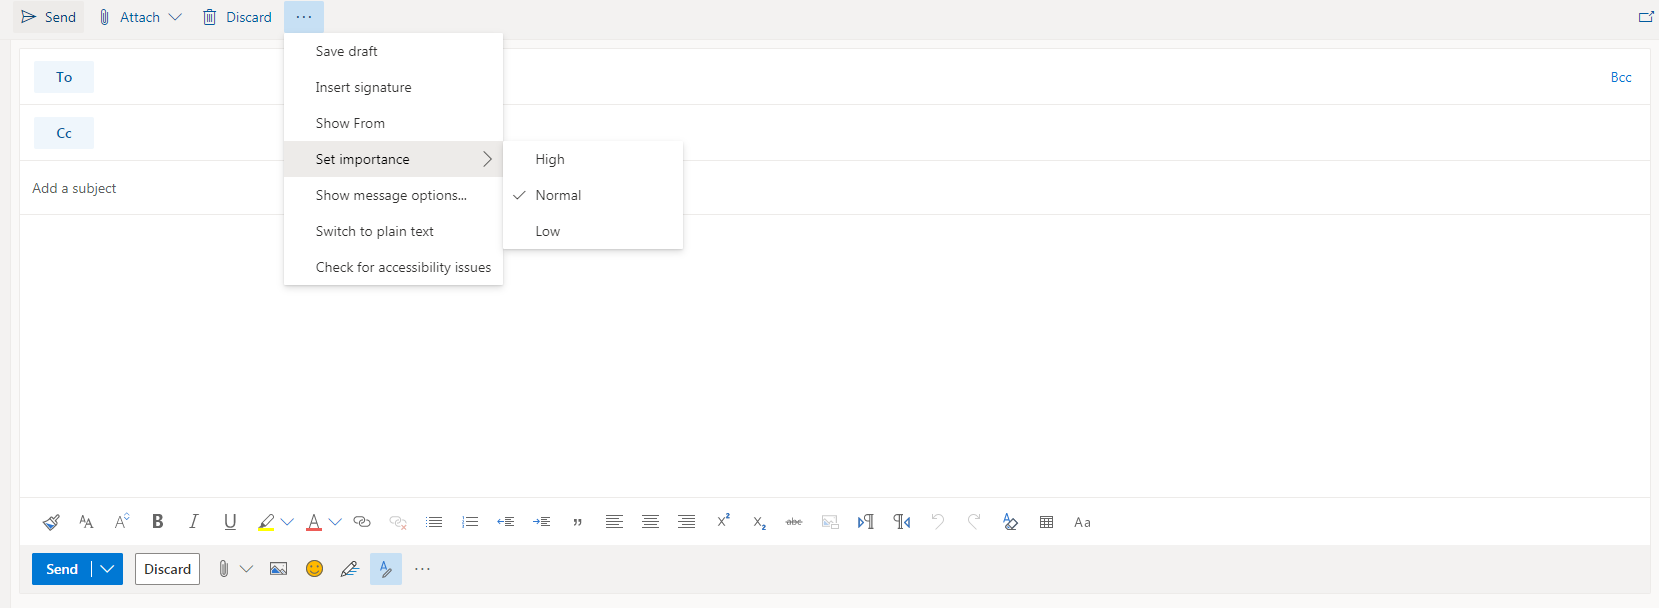
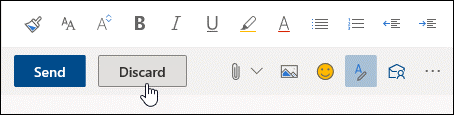
Across the top of the message composer, you will see options to send the message, attach a file(s), discard the message, as well as the additional options available when you click on the ellipsis icon.
You also have the ability to open the message in a new window by clicking the square with an arrow icon in the upper right corner of the message window.
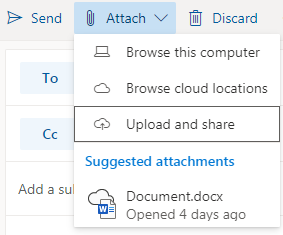
To attach a file to the message, select the attach link at the top or the paperclip icon at the bottom of the new message window.
- Type your message and then click send.
The very bottom toolbar also includes options for inserting pictures, emojis and gifs, as well as access to the Microsoft Editor settings
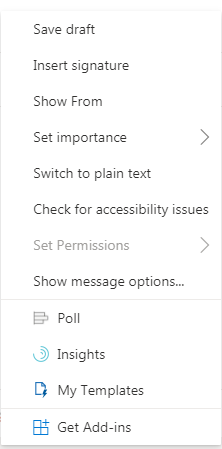
Clicking on the ellipsis icon at the bottom of the message composer displays the same options as the ellipsis icon at the top of the message. In addition, it provides access to:
- Create and add a link to a poll in your email
- View Microsoft account insights
- Create and manage templates for text that you use often in email messages
- Get add-Ins which are additional features that can be activated in Outlook
More on these features and how they can benefit you will be available in subsequent training documents.
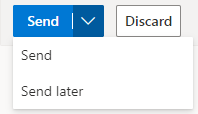
The send later feature enables you to defer sending an email and choose the date and time your email message is sent.
To send an email later:
- Compose your email as normal
- Next to the send button, click the downward facing arrow and then select send later.
- Choose the date and time when you want to schedule the message to be sent.
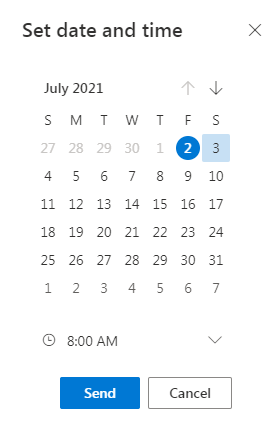
- Click Send.
The message will remain in your drafts or sent items folder (depending on the device) until it is due to be sent. You can edit or delete the message at any time until its scheduled send time. After editing, you must repeat steps two through four.
You do not need to be online when the message is scheduled to be sent.
You can forward only one message at a time. When you forward a message, the original remains in your mailbox and a copy is sent to the new recipients.
To forward an email:
- In your message list, choose the message that you want to forward.
- In the top right corner of the message pane, click on either the arrow pointing to the right or the ellipsis and then click forward.
- Type your message and then click Send.
To reply to an email:
- In your messages list, choose the message that you want to reply to.
- In the top right corner of the message pane, click on either the single (reply) or double (reply all) curved arrows. You can also click the ellipsis and choose either reply or reply all.
- Type your response and then click send.
By default, the original email and its history will not be displayed when you're replying to a message. To show the original email or change the email subject, click the ellipsis at the bottom of the message pane.
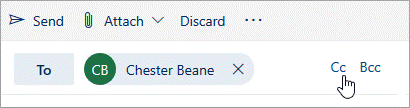
To add recipients to the Cc or Bcc lines, click the Cc or Bcc links on the right side of the To line.
Note: The names of people in the Bcc line are hidden from other recipients of the message.
To discard a message draft, click the discard button at the bottom of the message pane.
Reply and Reply All
When you reply to a message, you'll see RE: added to the subject line. The original message is added below the new message.
Note: Files attached to the original message aren't included when replying.
Forward
When you forward a message, the prefix FW: is added to the subject line to alert the recipient that they're receiving a forwarded message. The original message is included at the bottom of the forwarded message, along with any files that were attached to the original message. You can edit the text of a forwarded message or add and remove any attachments before sending.
Changing the Subject Line
When replying to or forwarding an email message, you can change the subject line. Simply delete the existing subject line, and type the new one.
***Unsent messages recently created that you are still working on will be displayed at the bottom of the screen.

You can click on them to activate the messages for editing
When opening an email message within Microsoft 365 Outlook for the web, there will be a number of options available.
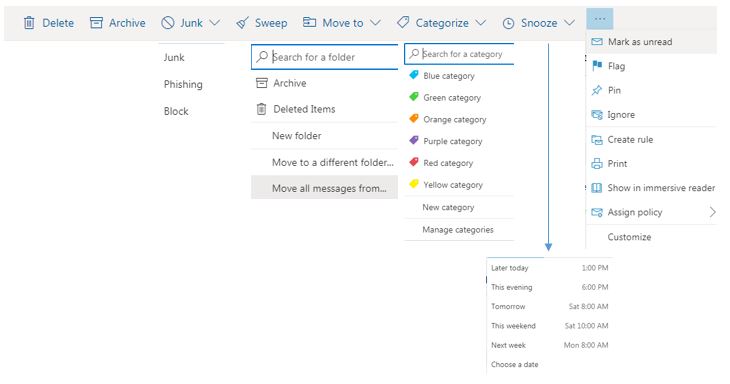
Clicking the downward facing arrow next to any of the items in the toolbar will display dropdown lists with further options, including:
- Archive: Stores the message in your Archive folder
- Snooze: The message will disappear for a while and then come back to the top of your inbox at a time you pick, as though you're receiving it again.
- Flag
- Pin to the top of the folder
- Ignore: This will delete all messages in the selected conversation from all folders except sent items. All new messages that are part of the selected conversation will also be deleted
- Create rule
- Show in Immersive reader: Opens the message in a window with large text and reads the message to the user.
- Assign policy: Assign retention policy
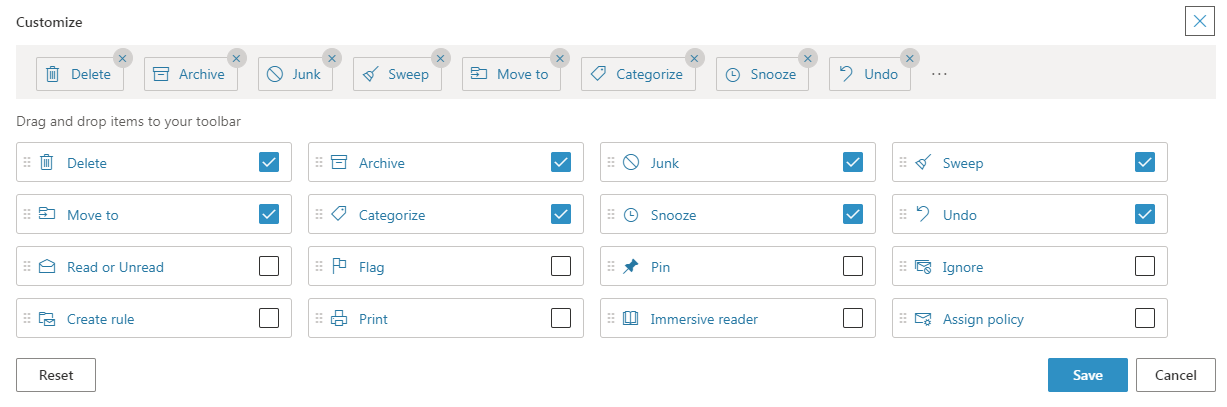
- Customize: Customize what you see in the toolbar versus the dropdown lists
Outlook for the web provides the standard reply (all) and forward options for email messages. The following options are also available when clicking on the ellipsis icon next to the forward and reply buttons:
- Reply
- Reply all
- Forward
- Other reply actions
- Reply all by meeting
- Reply by IM
- Reply all by IM
- Like
- Delete
- Mark as unread
- Flag
- Add to Safe senders
- Security options
- Mark as junk
- Mark as phishing
- Block sender (will display sender's name)
- Report a concern
- View
- Open in new window
- Translate
- Show in immersive reader
- View message details
- Advanced actions
- Create rule
- Assign Policy – set retention setting
